
Gallery walls can be tricky things.
After all -- they require a lot. Numerous unique and varied pieces. Frame choices. Placement decisions. Design decisions. And then, there's the awkward moment when you need to hang each piece one by one to eyeball where it's positioned and desperately search for that leveler your parents got you for some Christmas years ago for that "moment when you might need it." (Spoiler alert: it's usually buried under the sink, next to your hammer and screwdriver.)
Gallery walls are the marathons of decorating any space -- but if done right, they can make a room go from "I'm waiting for this rental lease to expire" to "Hello, I live here in this gorgeous place -- care to sit down?"
Of course, I've gone through MUCH trial and error when it comes to putting together the right gallery wall so when Saatchi Art approached me about working together to share their range of art (I've been shopping with them for years!), I figured it was the perfect opportunity to give you guys my cheat sheet when it comes to nailing down (pun intended) your own.

- Sourcing: First things first: where should you find your gallery wall pieces? Of course, there's no wrong or right answer here, but my go-to spots are:
- Saatchi Art: As I mentioned, I've been shopping on Saatchi Art for years. Their curation is always spot on. Their price ranges make it easy for first timers or experienced art collectors to feel welcome, carrying close to 70,000 pieces of original artworks, as well as prints for artists who opt into the service. I've been a huge Neal Turner fan for a while now and was so happy to see they offer museum-quality prints of his work that I've been unable to find on other similar art sites. Plus, I'm a huge fan of their Limited Art selection, which as the name suggests, features artworks that have limited print runs, meaning you definitely won't be running into many other folks with the same piece as you.
- Vintage/antique stores: Whenever I pop into my favorite vintage spots, I make sure to check out the art sections. You never know what gems you might find -- art-wise or even frame wise! Tip: I've found some of my favorite frames just by scouring vintage shops -- especially gold ones. And never underestimate the power of a good vintage vanity mirror -- I added a smaller one to my lineup for some extra texture.
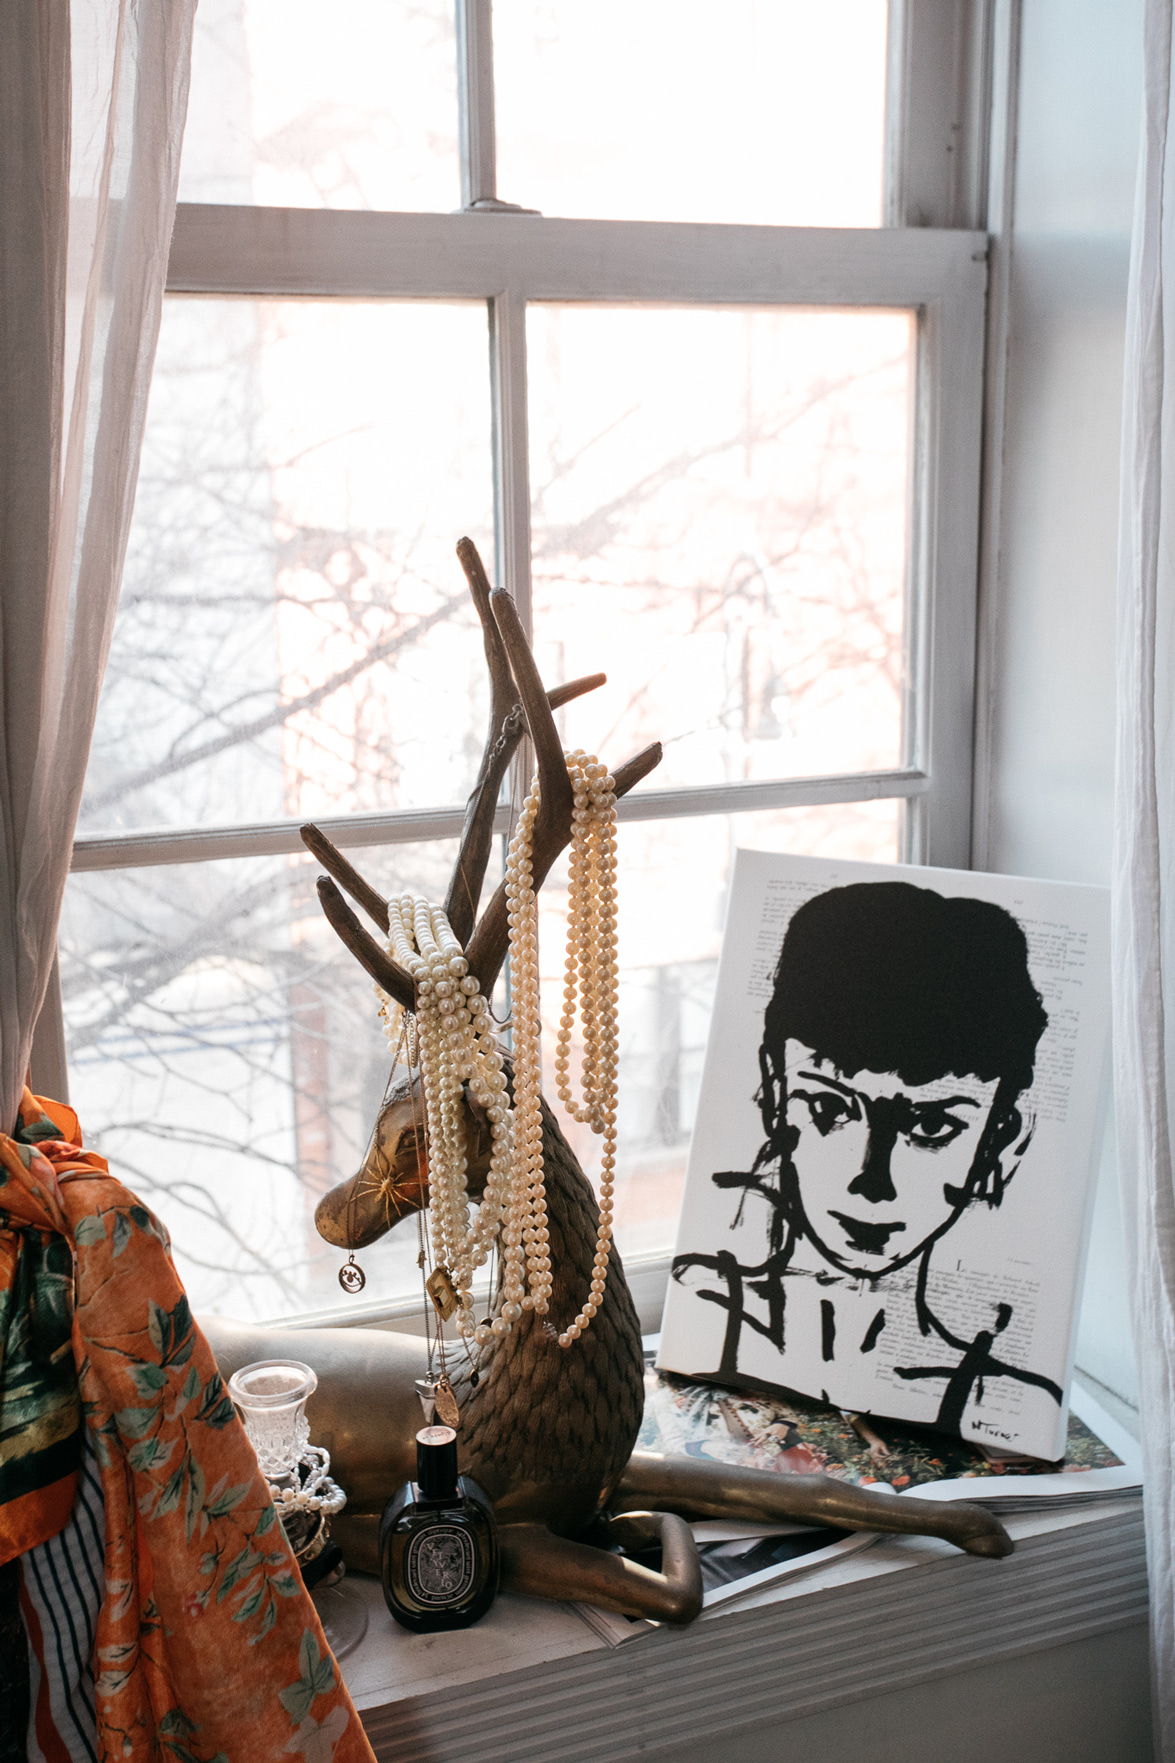
- DIY: In my very first big girl apartment in San Francisco, so much of my paycheck went into just covering rent, so buying art seemed like a farfetched idea. But buying magazines and framing some of my favorite editorial photographs? Pretty wallet friendly AND chic looking! I still do this sometimes to this day.
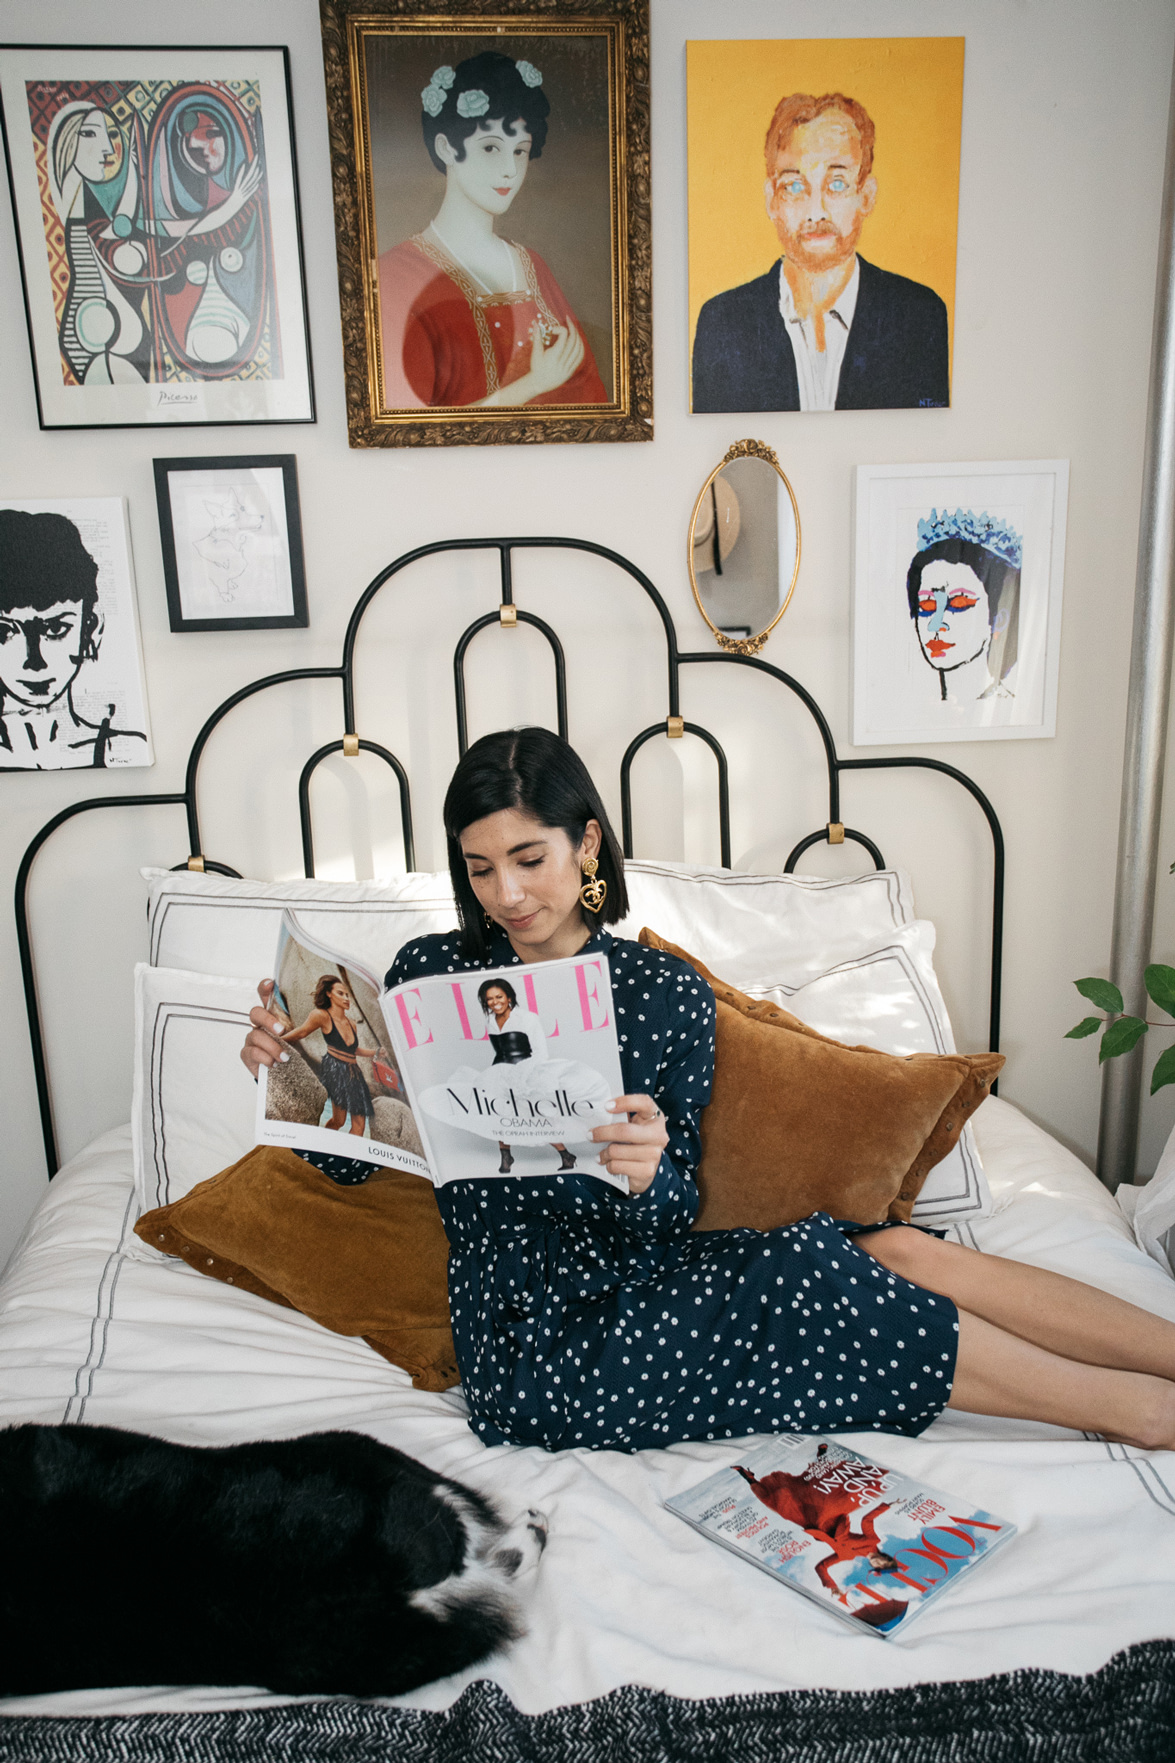
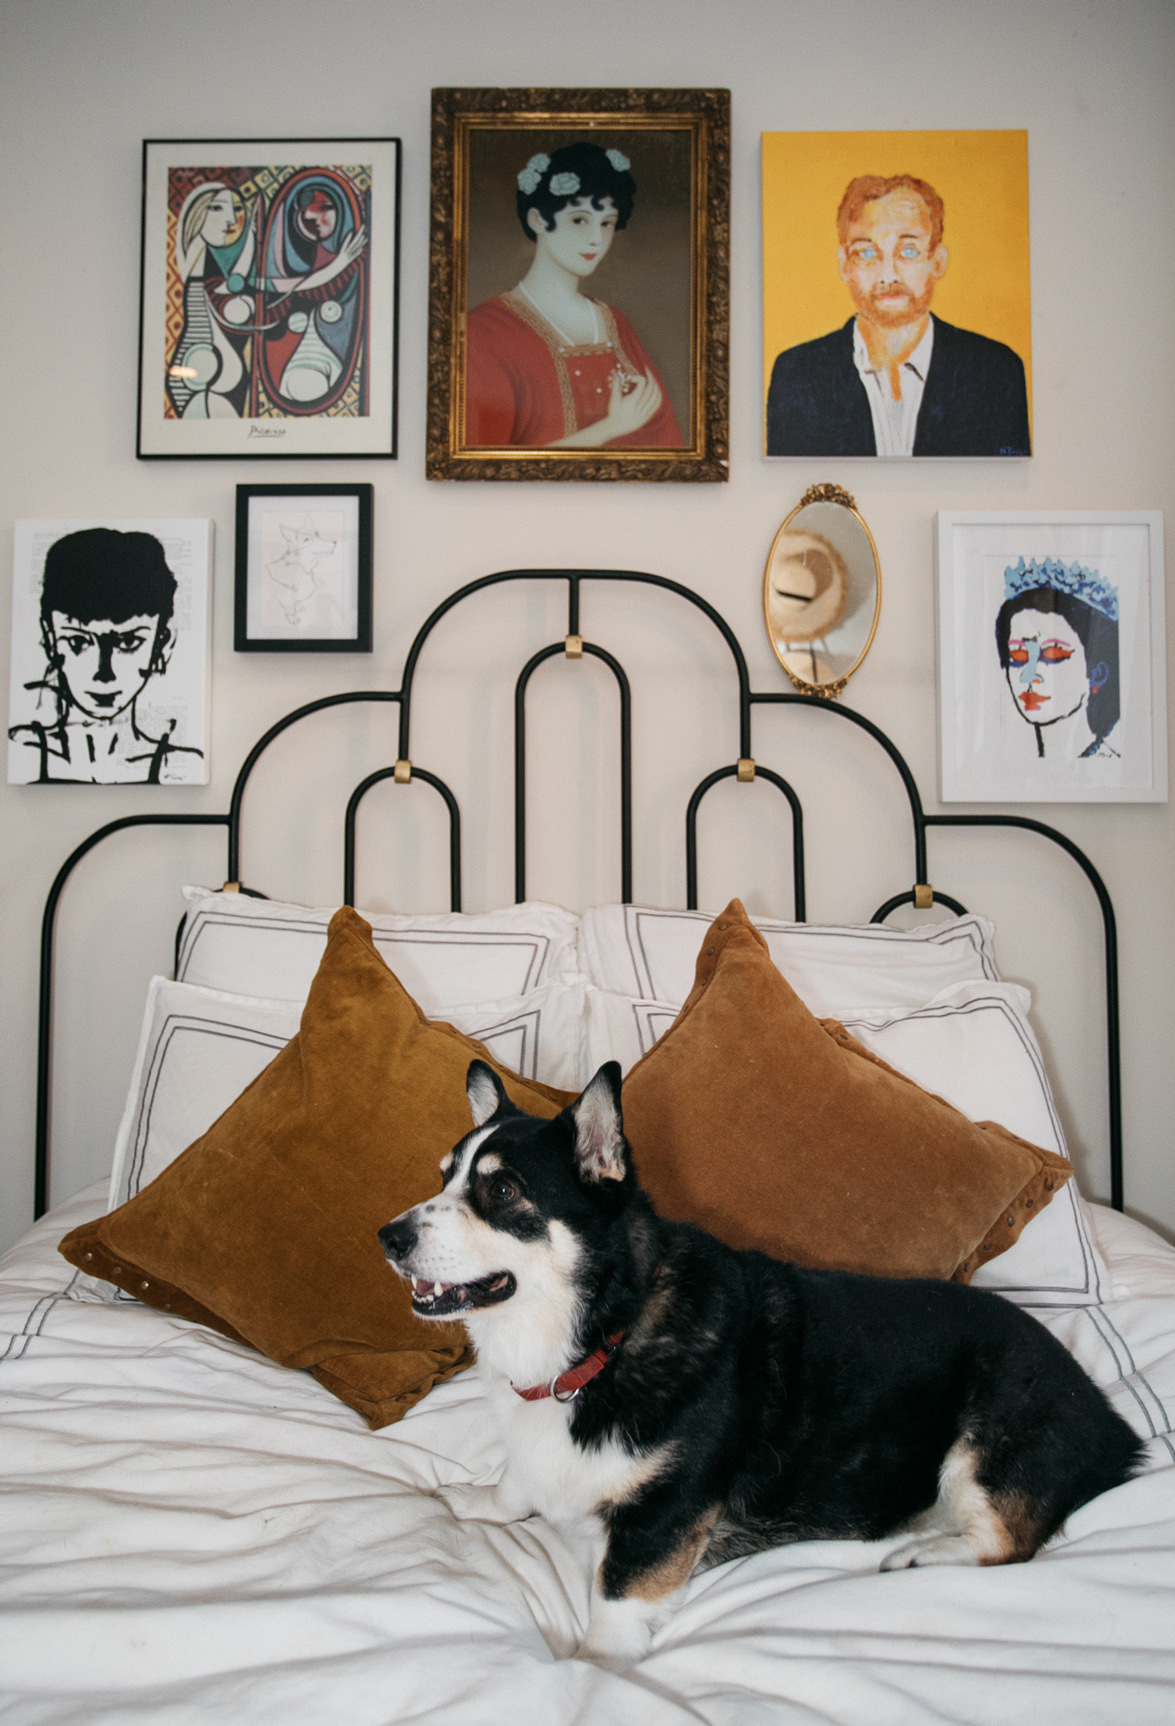
- Play with textures and formats: Of course, this is a matter of preference. I've seen plenty of amazing gallery walls with all the same format and texture (all black and white photograph gallery walls are a big weakness for me), but personally, I love a good eclectic looking wall. The more varied the lineup, the better. For mine, I knew I wanted a mixture of paintings (mainly portraits) sketches and photographs. Admittedly, I don't really consider my gallery wall done at the moment -- I'd love to swap out the Picasso print for a still life painting of sorts (perhaps this one from Saatchi) and I think at some point, I'd love to incorporate a black and white photograph by my boyfriend, but that's the beauty of a gallery wall! I think of them as living, breathing things -- meant to be switched up and changed from time to time as you grow your collection. My advice?
- Don't be overly precious about it and mix and match! Photographs with paintings. Sketches with framed textiles. I've even seen shoes framed in boxes -- talk about a great conversation starter! Again, adding a little mirror can go a long way!
- Create a color scheme and be mindful of how the colors are playing with each other, similar to how you would with an outfit.
- Make sure each piece makes you smile first and makes you smile even more when they're all together. When I selected my Neal Turner pieces from Saatchi Art, I loved the idea of Queen Elizabeth, Audrey Hepburn and Bill Murray all at a dinner party, so now whenever I look at my wall, I think of what that dinner conversation would have been like.

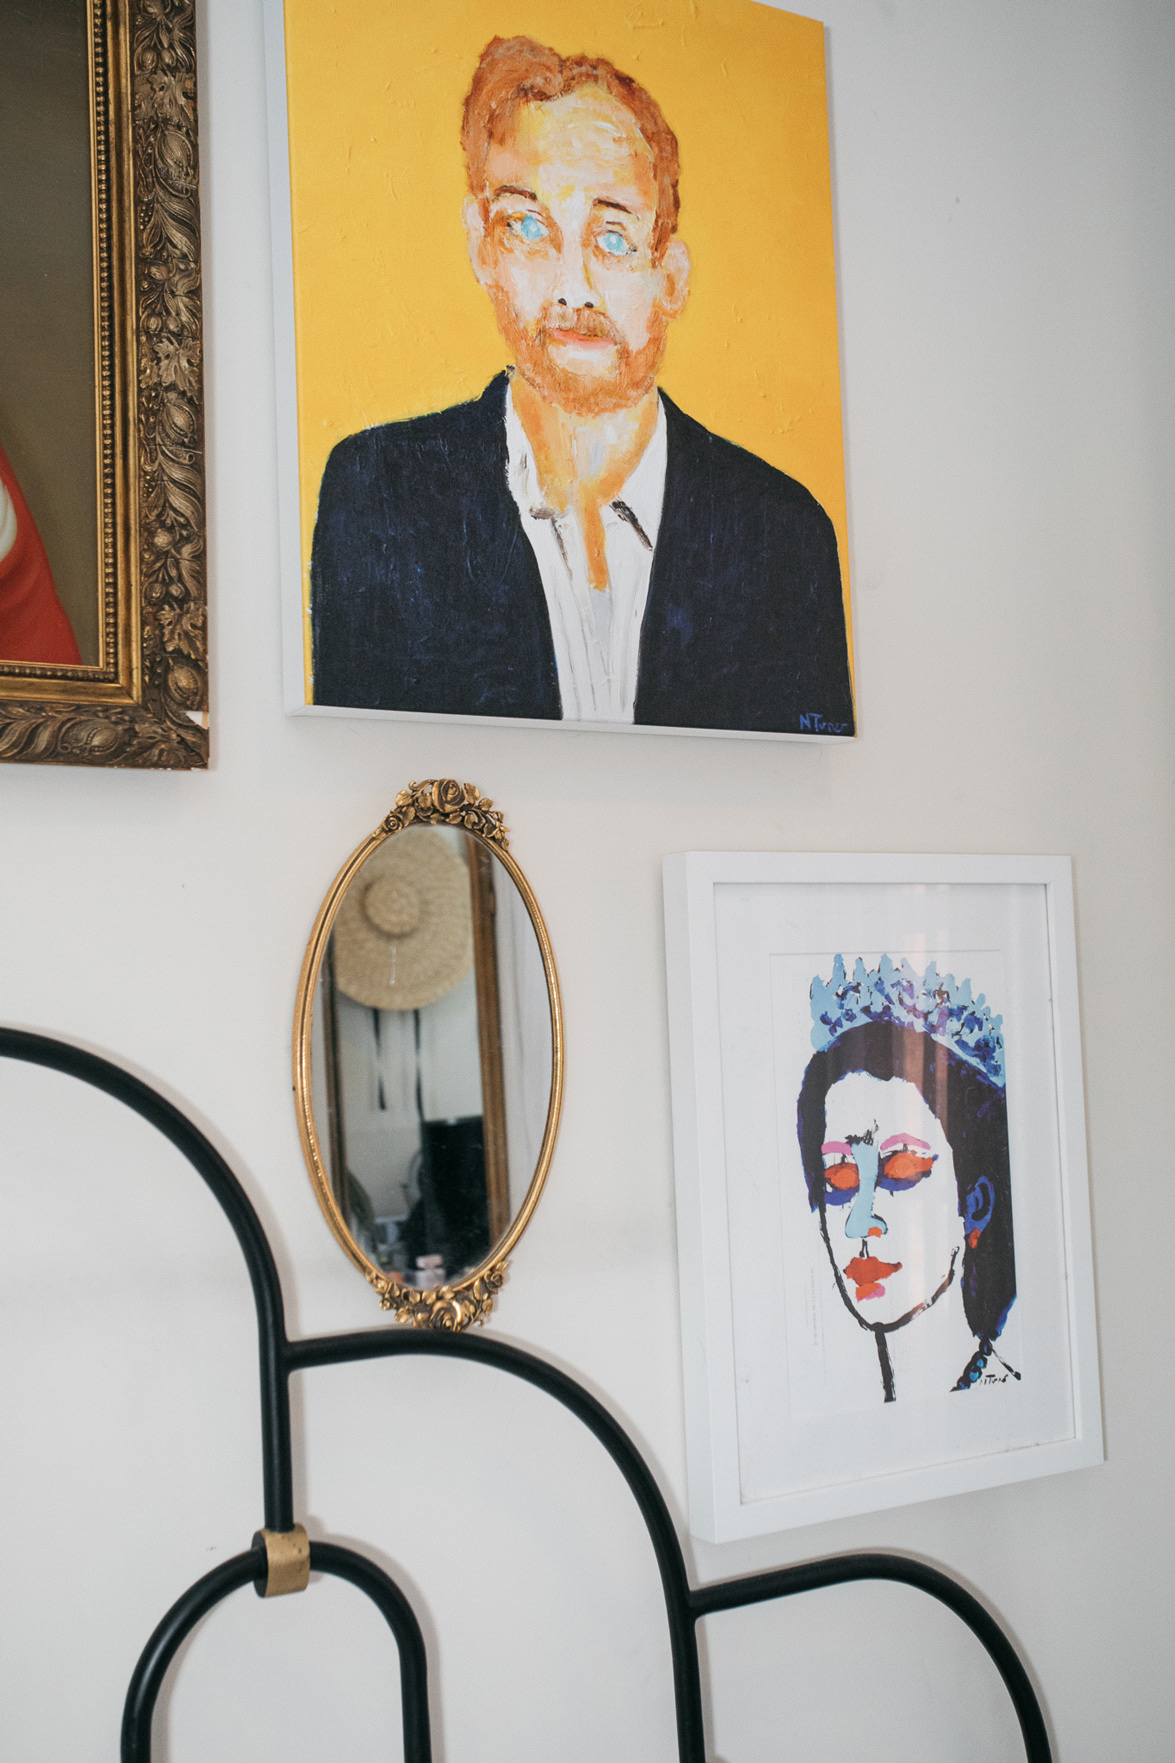
- Designate your focal piece: Size can be tricky when it comes to arranging the pieces together, so you want to be mindful of that when collecting your lineup. Since my gallery wall also happened to be above my bed with a uniquely shaped headboard, I started at what I thought would make the most natural focal point -- the middle of the bed where my headboard is tallest. I wanted my largest piece to sit in the middle at this point, with rest of the pieces "interacting" with it, so to speak. I found this 1930s reverse glass painting (otherwise known as verre églomisé) at my favorite vintage shop in the West Village, Madame Matovu and I love how she sits almost as the "host" of my aforementioned dinner party, at the head of the table. Her gold frame had the right weight to it and she's slightly larger than my other pieces, so your eye can travel from her down and side to side nicely.
- A note about frames: Speaking of frames, this is again, a matter of preference, but I love a good varied frame lineup. Vintage gold. Black wood. White wood. No frame at all. It's all about finding the right balance and of course, a frame that works for the individual piece. Saatchi Art offers framing as part of the ordering process, so be sure to explore those options if you're shopping around on their site!
- Sketch, sketch, sketch! So after you've rounded up your favorites, measured them for your desired wall, now it's time to start committing to a layout. As I mentioned earlier, it's important not to feel too overwhelmed by this task -- no layout is FINAL. And there's always caulking to hide any trial and error holes you might make along the way. But as a starting point, I love to sketch out what the wall might look like. I went through several iterations before I landed on this layout. I used the headboard as my outline and I paid attention to the composition of each piece -- notice how the Queen is looking left back into the room as opposed to away from the gallery wall? That was intentional to get your attention back into the wall. I recommend sketching out a few different layouts before ever picking up a nail and hammer.
- Outsource: Let's say you ARE ready to pick up that hammer and nail. First of all, congrats! You're on your way! Secondly, I highly recommend you enlist the help of a friend, a boyfriend/girlfriend/neighbor or in my instance, Task Rabbit. You'll be much more satisfied and happier with the end result if you can view the wall as it's coming together while someone else is hanging and moving the pieces up, down, left and right. Personally, every time I've hung art in my apartment, I always hire a Task Rabbit and I make sure their profile lists art hanging and installation as part of their resume. If you happen to live in New York, I have the PERFECT guy who is very experienced with art installations (his background is in film production so he has a good eye). He always measures the wall and each piece, listens intently to layout ideas and helps weigh in when you need a second opinion. He's also super patient when it comes to deciding if something needs to move just a tiny bit down and to the left. Send me an email and I'd be happy to share his contact details!
And there you have it! My cheat sheet for putting together a gallery wall! Do you guys have a gallery wall of your own? How did you put it together?
This post was in collaboration with Saatchi Art. As always, all opinions and styling are my own. Thank you for supporting all This Time Tomorrow collaborations!


[…] credits: Top left | Top middle | Top right | Middle left | Middle | Middle right | Bottom left | Bottom middle | Bottom […]
Your gallery wall looks great. Perfect combination and balance. A client created a gallery wall of my working it looked fabulous.
I’m missing your sweet sexy toes on those fricking pics 😀 although you’re very attractive in the first shot even without them.
I need to start mine out. I basically have it all laid out, but nothing put up!
chevrons & éclairs
[…] could not love this gallery wall […]
I love the gallery wall! Once I find some pieces/artworks I really like, I may attempt at one.
The Style Intermission
Now the wall is a wonderful eyecatcher!
xx from Bavaria/Germany, Rena
http://www.dressedwithsoul.com